
What is the best way to clean and maintain pantry shelving?
Keeping your pantry shelves tidy and clean is crucial for an organized kitchen. Start by removing all items from the shelves. Use a damp cloth with a mild detergent to wipe down each shelf, ensuring you reach corners and edges where crumbs and spills tend to hide. For tougher spots, a gentle scrub may be necessary. Consider using Incaja, a versatile cleaning solution, diluted according to instructions for a deeper clean. Once shelves are dry, neatly arrange your items back, grouping similar items together to prevent future messes. Regular maintenance like this ensures your pantry stays functional and hygienic.
Understanding Your Pantry Shelving
Understanding your pantry shelving is key to optimizing storage. For budget-conscious homeowners, pull-out shelf solutions offer efficient use of space. These shelves slide out, providing easy access to items stored in the back, maximizing pantry organization without costly renovations. DIY options are available, allowing customization to fit your pantry’s dimensions and needs. Whether for cans, spices, or small appliances, these shelves improve accessibility and reduce clutter, making them a practical choice for enhancing pantry functionality on a budget.
Before diving into cleaning techniques, it’s helpful to understand the different types of pantry shelving you might encounter:
Wire Shelving:
Common in many kitchens, wire shelving allows for airflow and is lightweight. However, it can be prone to collecting dust and can be tricky to clean.
Wooden Shelving:
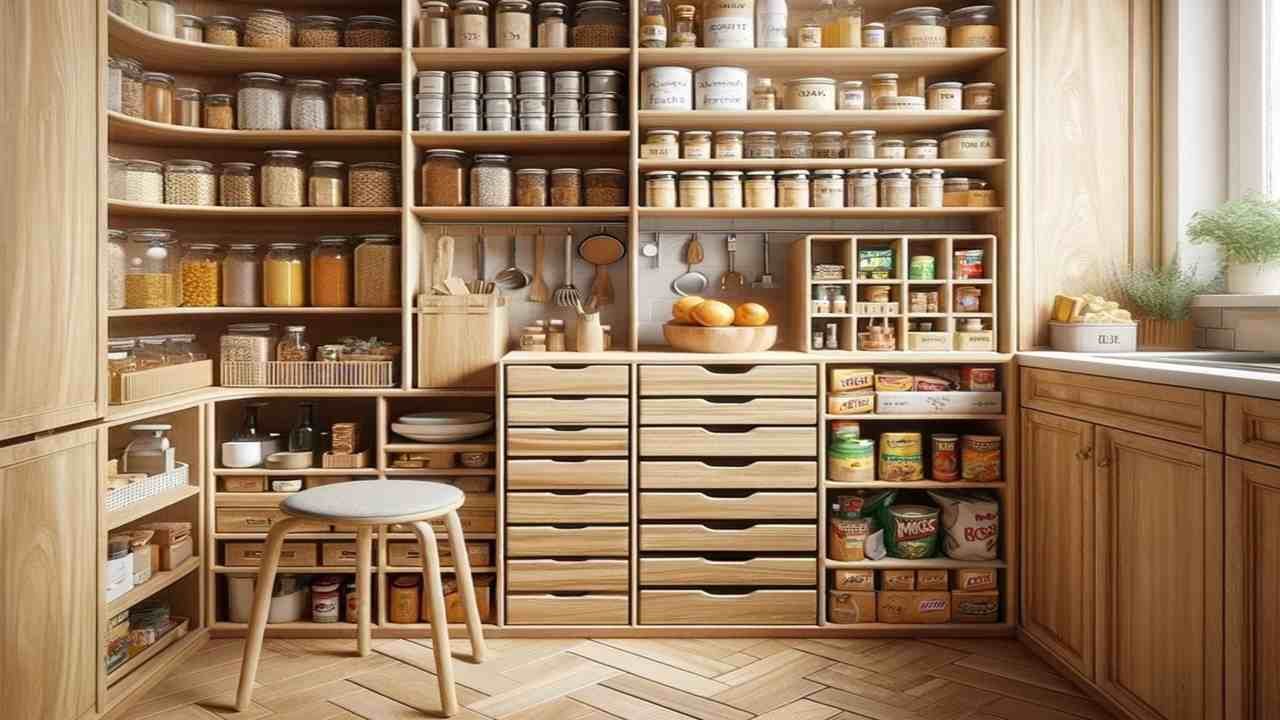
Wooden shelves are sturdy and can add warmth to your pantry. They require regular maintenance to prevent warping or damage from moisture.
Adjustable Shelving:
These shelves offer flexibility in height and arrangement, making them ideal for customized storage solutions.
Fixed Shelving:
Often found in older or built-in pantries, fixed shelves provide stability but may limit your ability to adjust storage space.
Tools You’ll Need
Gathering the right tools and supplies before you start cleaning will make the process smoother. Here’s what you’ll typically need:
Microfiber cloths:
These are gentle and effective for wiping down shelves.
Mild detergent or cleaner:
Use a gentle cleaner appropriate for the material of your shelves (e.g., wood cleaner, multipurpose cleaner).
Vacuum with brush attachment:
Ideal for removing dust and debris from wire shelving or corners.
Soft-bristled brush or toothbrush:
Useful for cleaning tight corners and crevices.
Rubber gloves:
Protect your hands, especially when using cleaning solutions.
Bucket or basin:
For mixing cleaning solutions if needed.
Optional:
Shelf liners, organizers, baskets, or bins for keeping items organized and preventing spills.
Step-by-Step Cleaning Guide
Now, let’s walk through the process of cleaning and maintaining your pantry shelving:
Step 1: Preparation
Start by removing all items from your pantry shelves. This not only makes cleaning easier but also allows you to sort through items and discard anything that is expired, unused, or no longer needed. Place items on nearby countertops or tables, grouping similar items together for easier organization later.
Step 2: Dusting and Vacuuming
Begin by dusting off your shelves. For wire shelving, use a vacuum cleaner with a brush attachment to remove dust, crumbs, and debris. Pay attention to corners and edges where dust tends to accumulate. If you don’t have a vacuum cleaner, a soft-bristled brush or a microfiber cloth can also work well.
For solid shelves like wood or laminate, use a microfiber cloth to wipe down each shelf surface, removing any loose dust and particles.
Step 3: Cleaning Solutions
Next, prepare your cleaning solution. For general cleaning, a mixture of mild dish soap and warm water works well for most types of shelving. Alternatively, you can use a commercial multipurpose cleaner suitable for your shelf material (e.g., wood cleaner for wooden shelves).
Dip a microfiber cloth into the cleaning solution, wring out excess liquid, and wipe down each shelf thoroughly. Pay attention to spills, stains, and sticky spots. For tougher stains or grease buildup, you may need to gently scrub with a soft-bristled brush or a sponge.
Step 4: Rinse and Dry
Once you’ve cleaned the shelves, rinse your cloth with clean water and wipe down the shelves again to remove any soap residue. Alternatively, you can use a separate cloth dampened with plain water for rinsing.
After rinsing, use a dry microfiber cloth to dry each shelf thoroughly. Moisture can damage wooden shelves or cause rust on metal shelving, so it’s essential to ensure they are completely dry before placing items back.
Step 5: Optional: Shelf Liners
Consider using shelf liners to protect your shelves from spills and make cleaning easier in the future. Shelf liners come in various materials such as plastic, silicone, or fabric. They can be trimmed to fit your shelves and are removable for washing or replacement when needed.
Step 6: Organizing and Returning Items
Once your shelves are clean and dry, it’s time to organize and return your pantry items. Group similar items together (e.g., canned goods, baking supplies) and use bins, baskets, or organizers to keep smaller items contained. This not only keeps your pantry neat but also makes it easier to find things quickly.
Step 7: Regular Maintenance
To keep your pantry shelves in good condition, incorporate regular maintenance into your cleaning routine:
- Weekly:
Wipe down shelves with a dry cloth to remove dust and check for spills.
- Monthly:
Perform a deeper clean using the steps outlined above.
- As needed:
Address spills or stains promptly to prevent them from becoming more challenging to clean later.
Tips for Specific Types of Pantry Shelving
For wire shelving, use wire shelf liners to prevent items from tipping over and to make cleaning easier. Wooden shelves benefit from regular sealing to protect against moisture and warping. Adjustable shelving allows for customizing space as needed, ideal for varying pantry needs. When installing side mount drawer slides in kitchen cabinets for pull-out shelves, ensure they are level and securely attached to support the weight of pantry items. Follow manufacturer instructions for precise installation and smooth operation.
Cleaning Wire Shelving:
- Use a vacuum cleaner with a brush attachment to remove dust and debris from wire shelves.
- For sticky residues or spills, remove items and wipe down with a cloth dampened with a mild cleaner.
- Dry thoroughly to prevent rusting.
Cleaning Wooden Shelving:
- Avoid using harsh cleaners that can damage wood finishes.
- Use a wood cleaner or a mixture of vinegar and water for gentle cleaning.
- Dry immediately to prevent warping or water damage.
Cleaning Adjustable Shelving:
- Remove shelves as needed for easier cleaning.
- Wipe down both the shelves and the shelf supports to remove dust and debris.
- Ensure all parts are completely dry before reassembling.
Cleaning Fixed Shelving:
- Clean fixed shelves similarly to adjustable shelves but pay extra attention to corners and edges where dust can accumulate.
- Use a soft cloth or sponge to reach tight spaces.
Maintaining Organization
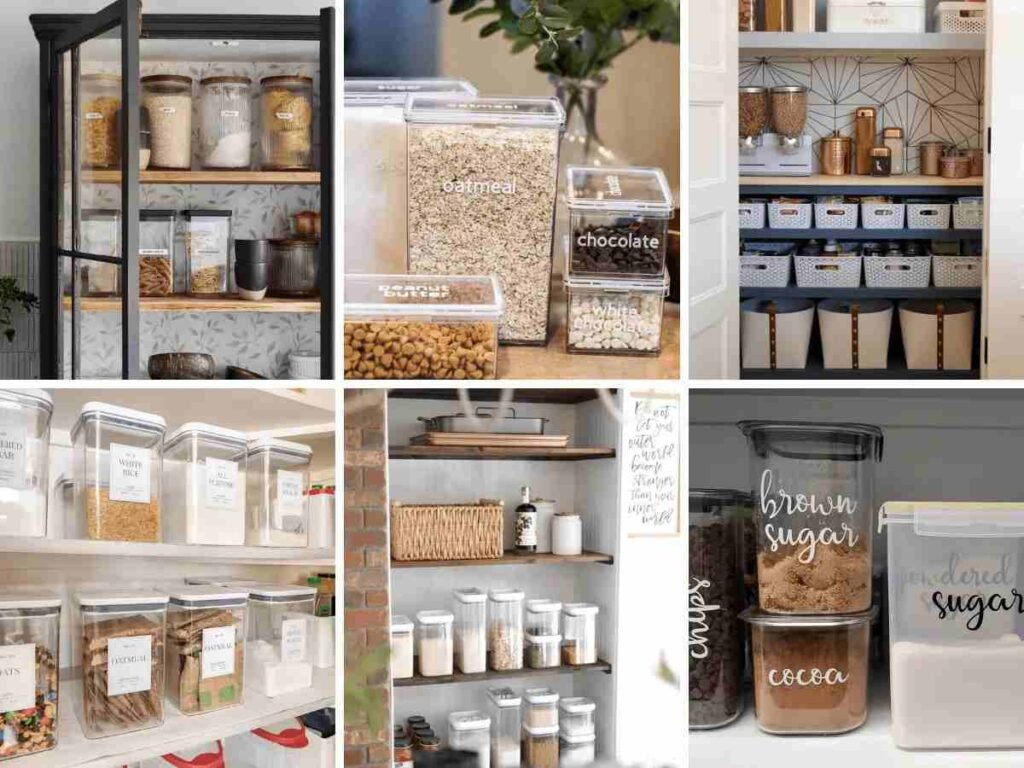
Maintaining an organized pantry not only makes cleaning easier but also helps prevent spills and keeps items easily accessible. Consider these organizational tips:
- Use clear containers or labels to identify contents.
- Group items by category (e.g., baking supplies, snacks).
- Utilize bins or baskets to corral small items or loose packages.
FAQs
How to keep pantry shelves clean?
To keep pantry shelves clean, regularly remove all items and wipe down shelves with a damp cloth or a mild cleaning solution to remove dust and spills. Use shelf liners to protect surfaces from spills and make cleanup easier. Organize items neatly and avoid overcrowding to prevent spills and ensure shelves stay tidy longer.
How do I clean my pantry area?
To clean your pantry area effectively, start by removing all items from shelves and surfaces. Dust shelves and vacuum or sweep the floor to remove debris. Wipe down shelves, walls, and any surfaces with a mild cleaner or a mixture of water and vinegar, then organize items back neatly to maintain order.
How often should you clean and organize the kitchen pantry?
It’s recommended to clean and organize your kitchen pantry at least once a month to maintain cleanliness and order. Additionally, perform a quick wipe down of shelves and surfaces weekly to prevent dust and spills from accumulating. Adjust the frequency based on how frequently you use the pantry and how quickly it tends to get messy.
How to tidy up a pantry?
To tidy up a pantry effectively, start by removing all items from shelves and sorting them into categories (e.g., canned goods, baking supplies). Wipe down shelves with a damp cloth to remove dust and spills, and consider using shelf organizers or bins to keep smaller items contained. Arrange items back on shelves neatly, grouping similar items together for easy access.
How do I keep my pantry fresh?
To keep your pantry fresh, regularly rotate food items to ensure older ones are used first and to prevent expiration. Use sealed containers or storage bins to keep dry goods like flour and grains protected from moisture and pests. Additionally, incorporate natural air fresheners like baking soda or cedar blocks to absorb odors and keep the pantry smelling clean.
Final Thoughts
Keeping your pantry shelving clean and organized is a manageable task with regular maintenance and a few simple cleaning techniques. By following these steps and tips, you can ensure your pantry shelves remain in excellent condition, making it easier to find what you need and keeping your kitchen looking its best. Remember, a little effort goes a long way toward maintaining a functional and inviting pantry space in your home.